Supabase Cloud Setup
In this guide, you will learn how to setup a supabase cloud project and link it to your local environment.
Who is this guide for?
- You don't want to setup supabase on your local machine
- You can't run docker on your computer
- You are experiencing performance issues using supabase locally
- You want to selfhost our frontend app but use supabase cloud.
If your requirement matches any of the above, then this guide is for you.
Video Walkthrough
Step by Step guide
Create a Supabase project
For this step you need to have signed up for supabase and create an account, just visit supabase.com (opens in a new tab).
Once you have an account just click on the New Project on your dashboard. After that you should see a similar screen to the below, fill in the fields.
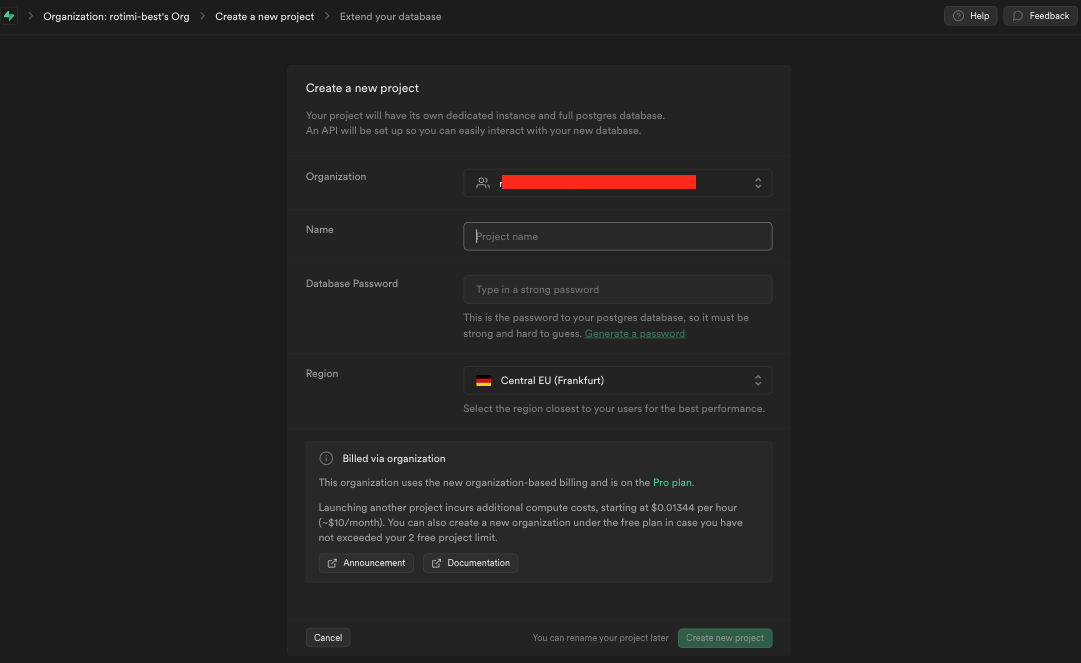
Make sure you save your database password somewhere, else you won't be able to get it back anywhere in the dashboard for security reasons.
Login to Supabase via the CLI
Open your terminal and go to the root of the project. Run the following:
pnpm supabase loginFollow the instruction in your terminal to generate your access token. Paste the token in the console and hit Enter
Push migrations to your Supabase project
- Go to the supabase dashboard, go to your project, click on the settings icon on the left side bar
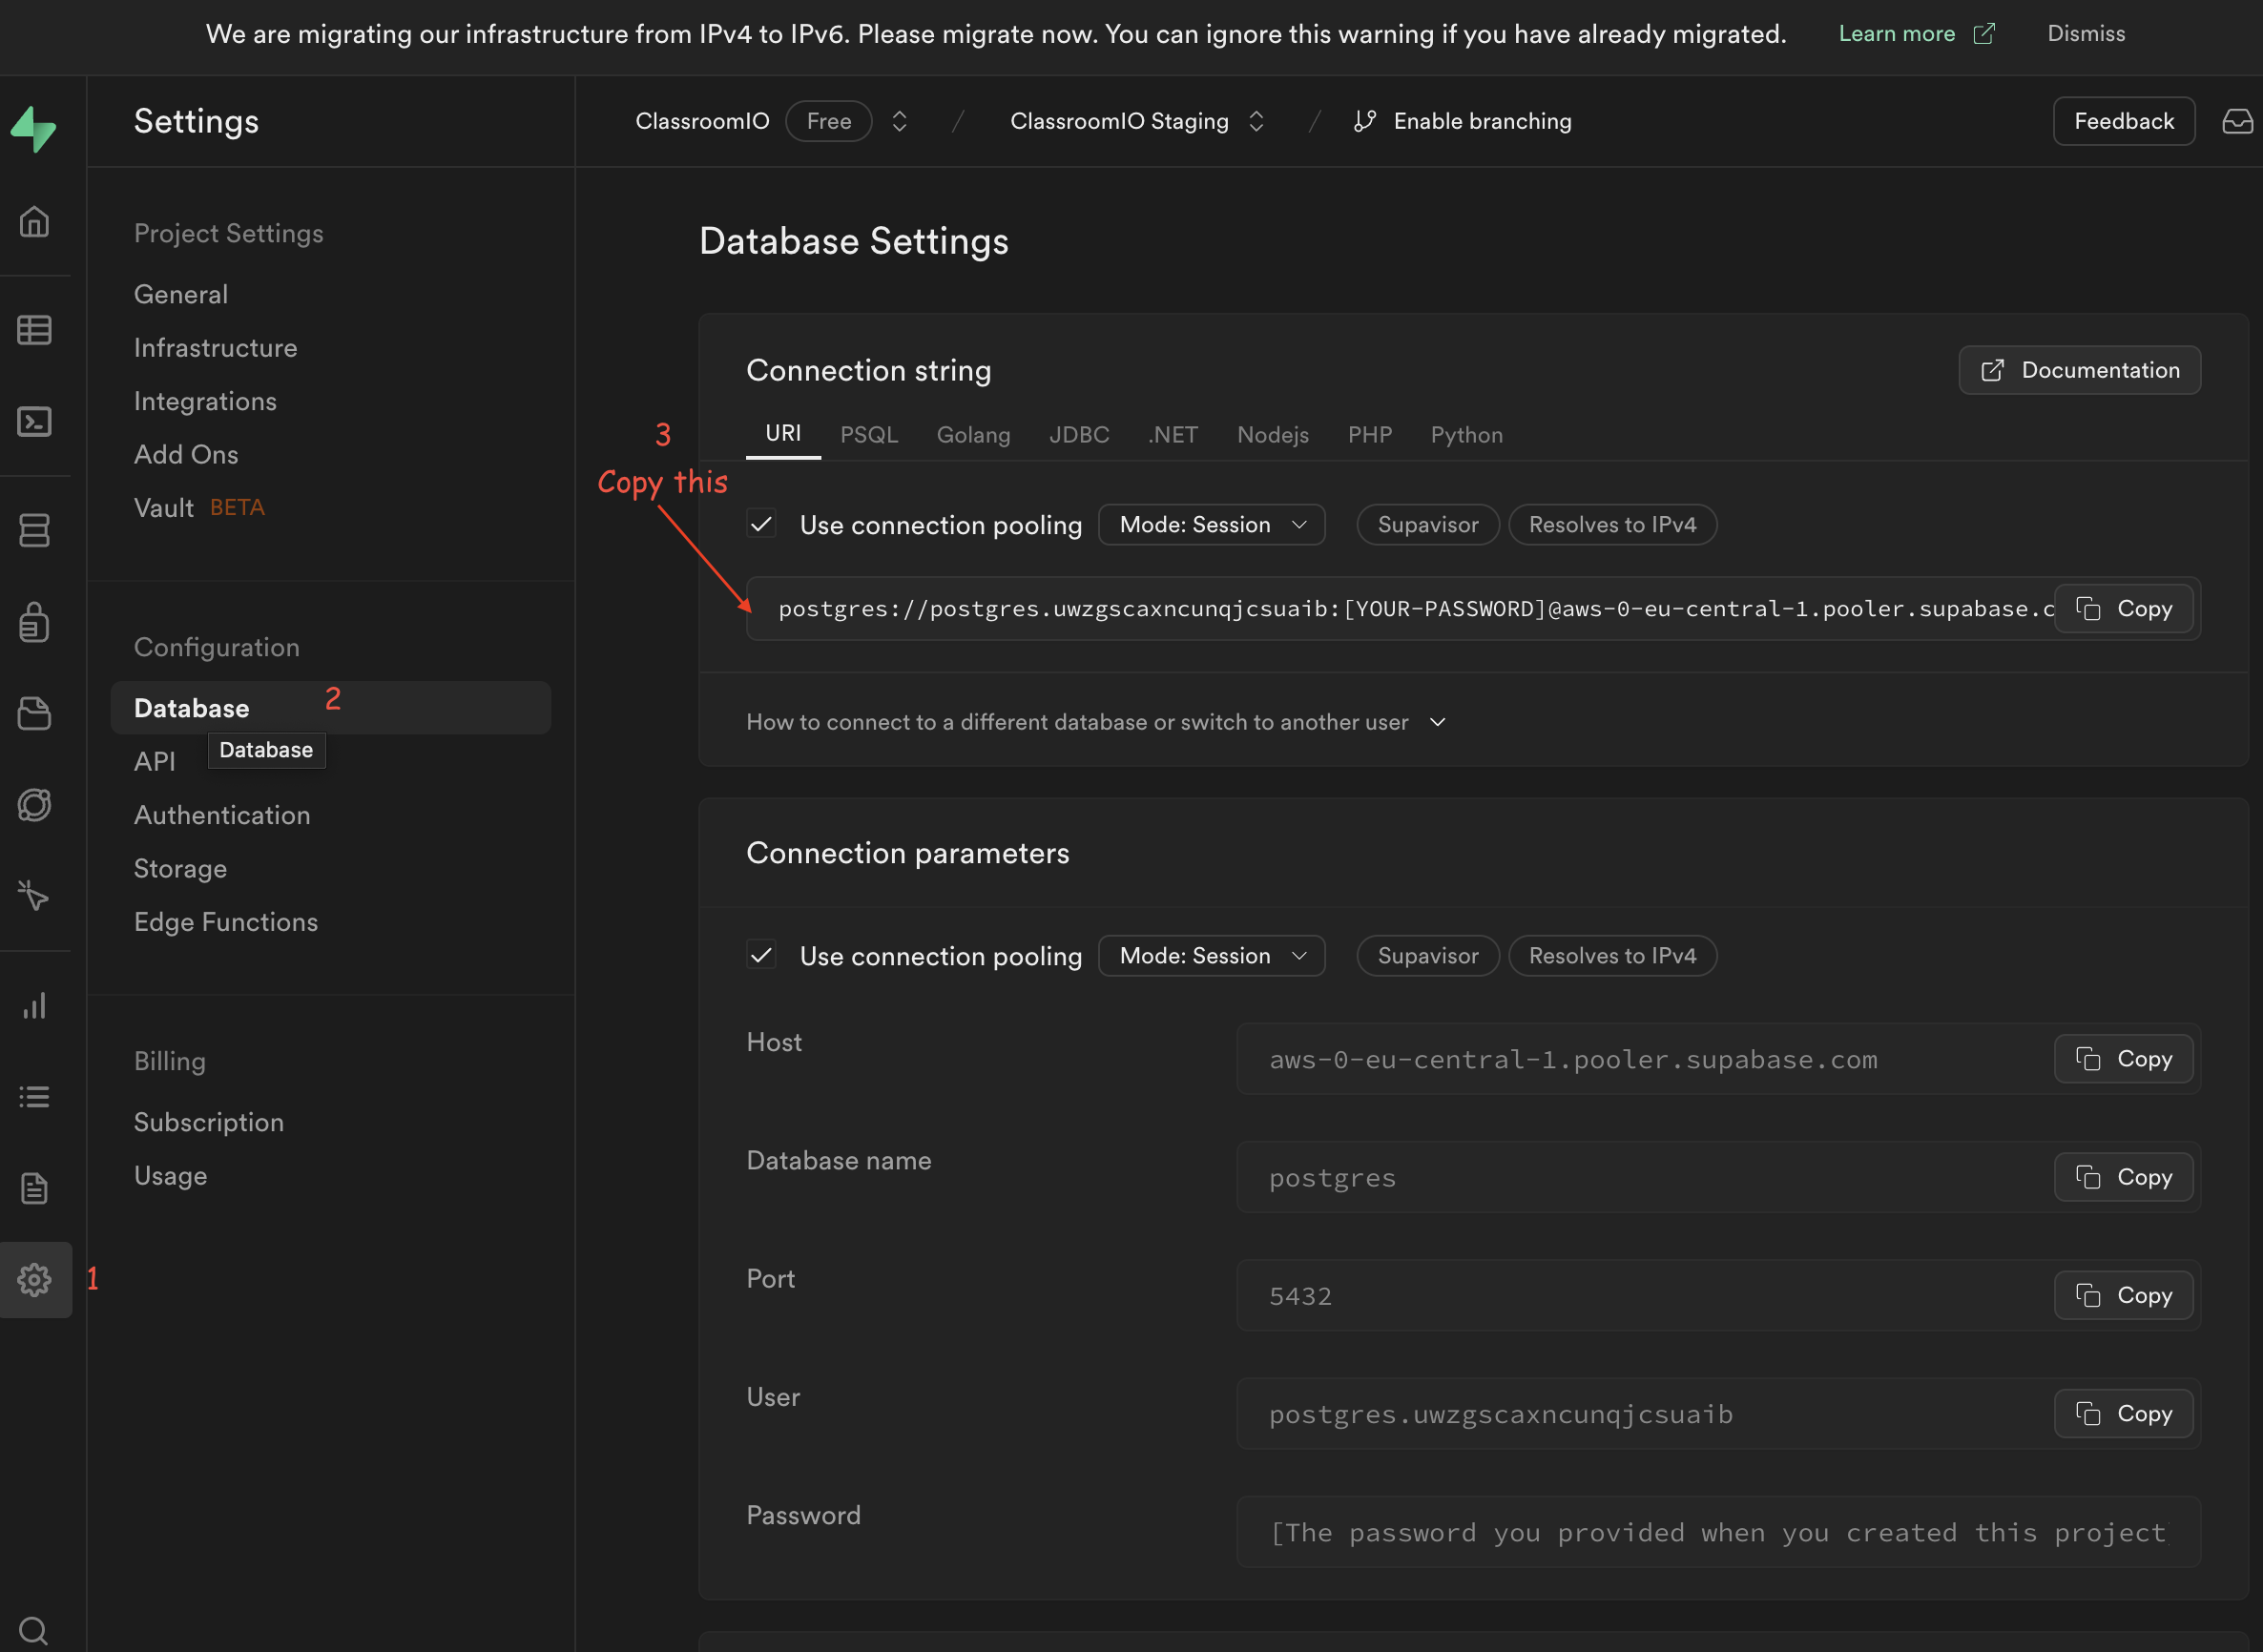
- Copy the URL in the image above for your
db url - Paste it somewhere
- In the url, replace
[YOUR PASSWORD]with your db password (which you saved in section 1). - Then run in your terminal:
pnpm supabase db push --db-url "URL HERE"Make sure you preserve the double quotes before and after the url. Only replace URL HERE with
your db url that contains your password
Result

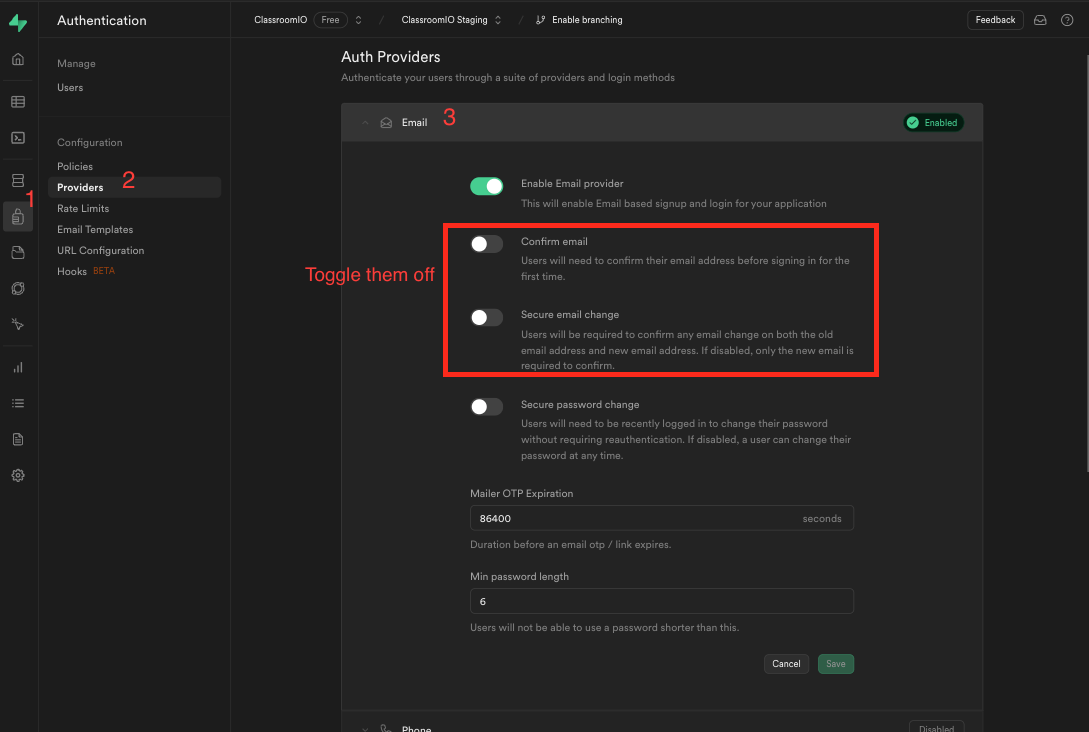
Configure Auth in your Supabase project
Here we will update our email configurations, to prevent supabase from sending confirmation emails on signup. This is because we don't have email confirmation setup on ClassroomIO, this feature will come later. If you don't disable it, you won't be able to signup into the application.
Add configurations to your environment variables
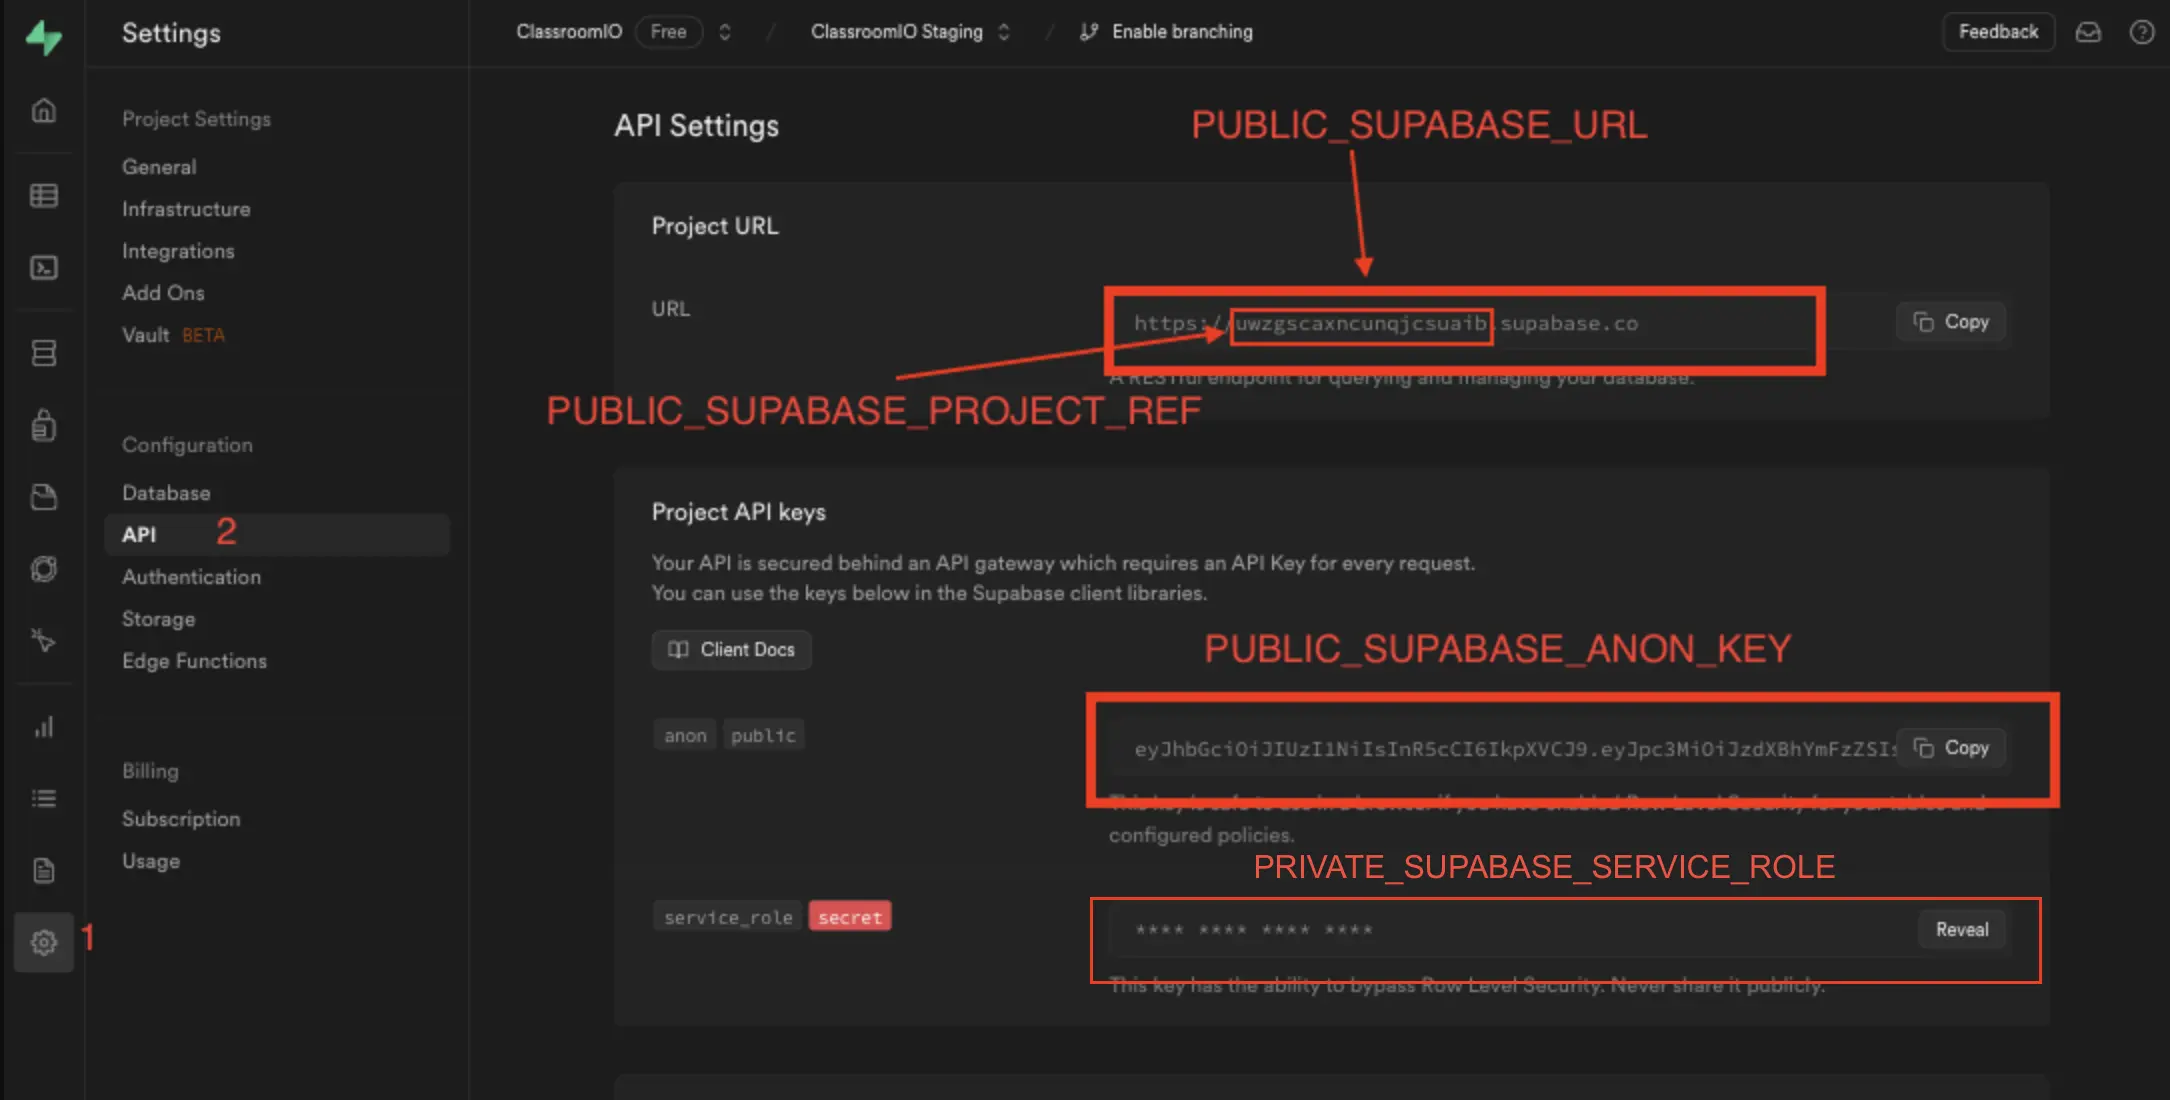
Now with all these set up you need to get update the .env file in apps/dashboard. You need to update the following environment variables:
PUBLIC_SUPABASE_PROJECT_REF=
PUBLIC_SUPABASE_URL=
PUBLIC_SUPABASE_ANON_KEY=
PRIVATE_SUPABASE_SERVICE_ROLE=
To get the correct environment variables, follow the instructions in this image
Tada - That's all
Now you can run:
pnpm dev --filter=dashboard- Open the url in your browser
- Click on Sign up
- And that's it ...
Visit the Sign up guide to learn how to signup